When we first saw the glimpse of the Sabertooth Z97 Mark S in Computex, many of us were left with an excitement. A motherboard with a white PCB is something of a modder’s dream, white being one of those rare colors to be found in computer components which are directly visible through a cabinet side window. Since a motherboard forms a base of any enthusiast or modder’s machine, maintaining a color scheme becomes a major part of a build, and white being a neutral color can go along with any color on top of it. But making a white PCB is not short of its challenges; thus while we have seen some components already in the market like the Galax HOF series of cards, there seems to be a vacuum when it comes to manufacturers experimenting with the base color of the PCB. A modder does have the option of painting certain parts, but painting a motherboard is something that even the most daredevil enthusiast won’t try.
But aesthetics is only one part of the equation. If a component is all looks and no performance, chances are that today’s internet-savvy crowd will not accept it just for the bling. Hence ASUS’ choice of platform gets a nod from me here. The Sabertooth/TUF (The Ultimate Force) has always been known for a motherboard range aimed at stability and silent operation (though the bundled fans can get whiny at times). The Thermal Armor, the five year warranty, and the overall positioning of the Sabertooth as an SKU in ASUS’ lineup caters more towards the crowd who won’t be participating in overclocking competitions and don’t need fancy LEDs lit up all over the motherboard, but still expects the platform to be a solid day-to-day work companion. The military themed (camo, or camouflage) beige and navy-green Thermal Armor and DRAM, PCIe, Storage/Power connectors contribute to the popularity of the Sabertooth boards amongst many system builders as well, and we have seen ASUS bring the armor to the ROG boards as well (Maximus VI/VII Formula).
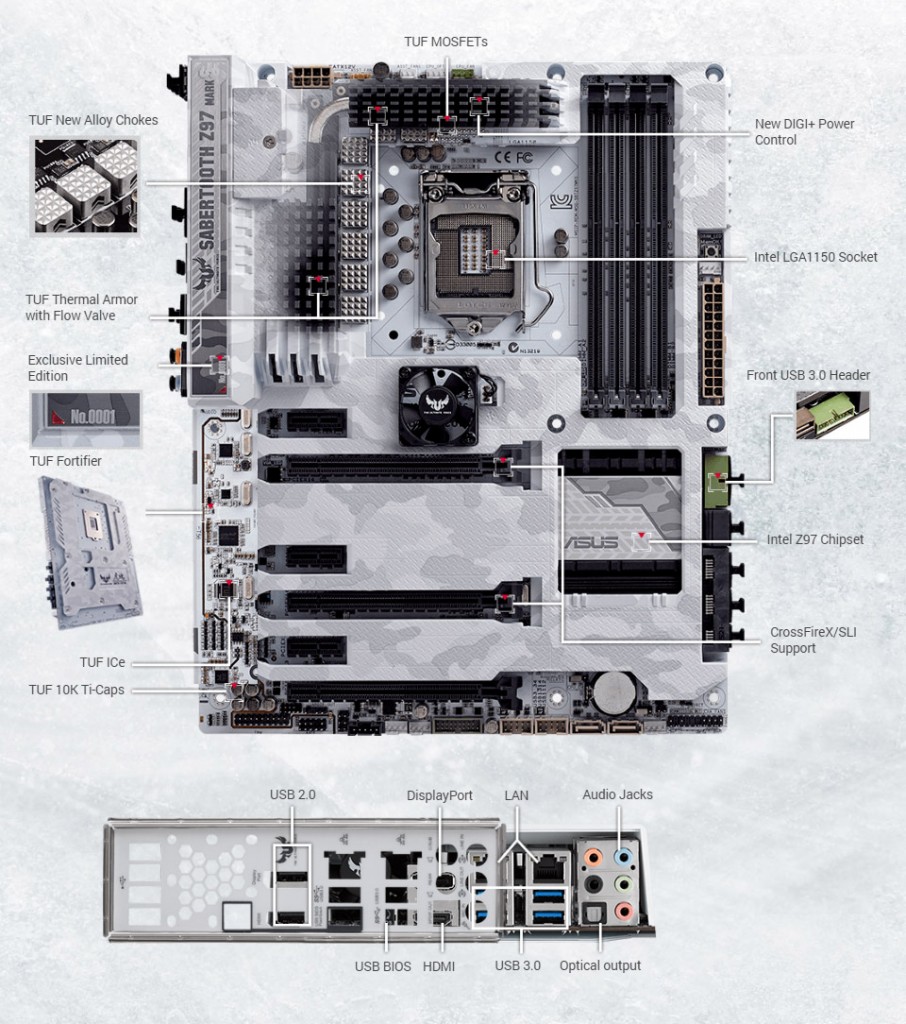
Sabertooth Z97 Mark S, codenamed Sabranco (Sabertooth + Branco, which means white in Portuguese) is basically an artic camouflage themed Sabertooth Z97 Mark 1, the flagship TUF motherboard for Intel’s Devil’s Canyon platform. The motherboards will be produced in limited batches, and hence each of them has with its own unique four digit serial number signifying its position in the production line. The review sample we received has number 2050. The fact that Mark S and Mark 1 are almost identical is both good and bad, the good part being that the Mark 1 is a solid motherboard, while the unavailability of any premium features over the Mark 1 being the bad one. We still get dual GbE (Intel and Realtek), Eight SATA ports and eight USB3.0 ports (that includes two internal USB3.0 headers), upgraded audio (ALC1150), x8/x8 PCIe layout for dual GPUs, a bevy of fan headers, and all other TUF oriented features plus a five year warranty instead of the standard three. The aesthetic touches on the UEFI are less pronounced, while the bundled ASUS software doesn’t have the same theme, which is unfortunate but maybe something to look forward to in future releases.
Motherboard Visual Overview:
The thermal armor covers most of the front side of the motherboard. On the left hand top corner, we see the beige colored 8 pin CPU power connector. Beneath the I/O cover there is provision to install a 40mm fan which once installed sits snug between the cover and the gap in the rear I/O shield. The I/O side of the thermal armor has the motherboard’s name written in a stylized manner atop a darker version of the arctic camo theme, and on the corner we see a red triangle painted alongside the unique four-digit batch ID of the motherboard.
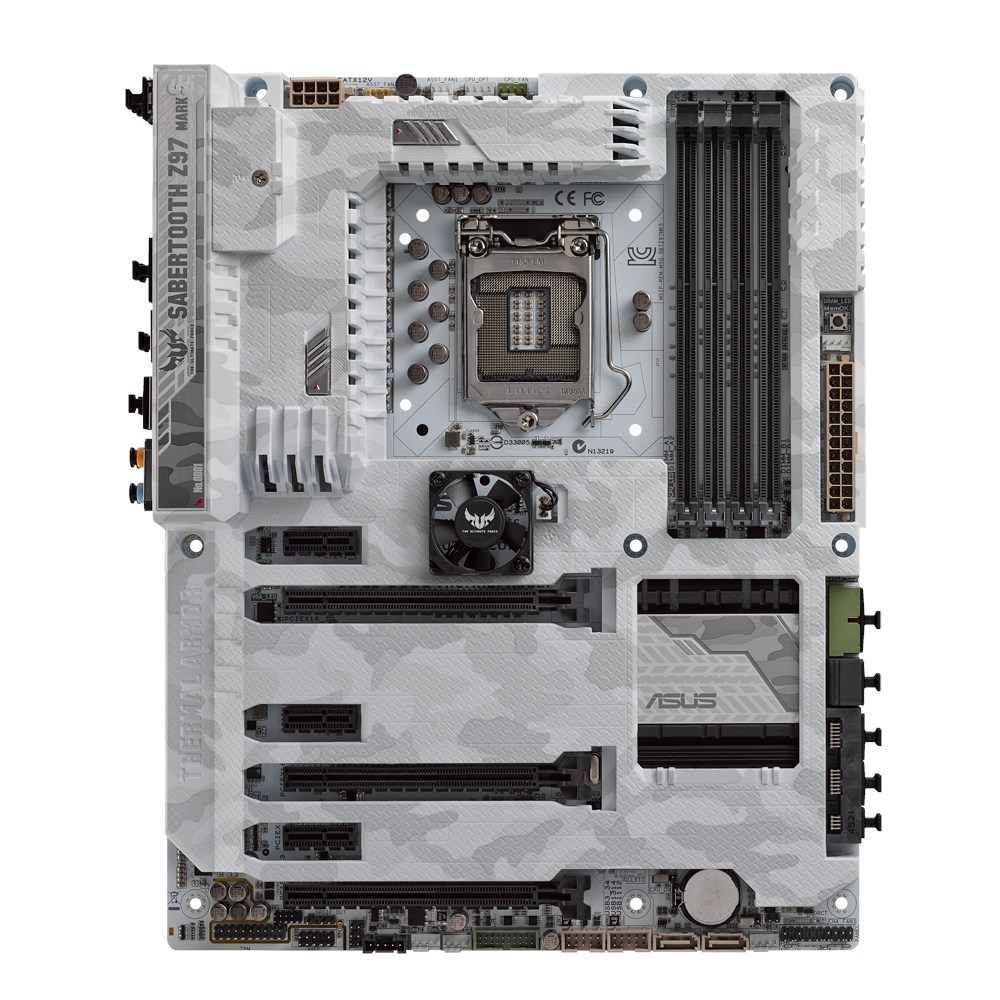
On the right hand side of the ATX 12v connector, we have a couple four fan headers, of them two ASST_FAN headers to plug in the provided fans, and CPU_OPT/CPU_FAN headers. Note that the ASST_FAN headers are 3 pin.
This is a right time to talk about the power delivery system used in the Mark S. ASUS is using an eight phase all digital power delivery system. The PWM system is a complexity 3 affair with eight IR3535 driver ICs driving one phase each. There are sixteen 6030AL High side MOSFETs and eight 4030AL Low side MOSFETs. ASUS is using LF-PAK MOSFETs from NXP. The controller IC being used is an IR3580 (single loop 8-phase VR12/VR12.5 Intel PWM controller).
The CPU socket section is relatively clutter free, but a word of caution here : the surrounding armor may cause issues with tubes of a few AIO liquid coolers, so it is often best to decide on your cooling or read up on user experience beforehand. Other than that, the bare CPU socket area gives us a good glimpse of the board’s white PCB. The DRAM slots beside it are color coded grey/black (though the grey that ASUS is using makes it look more on the black side) to indicate dual channels. The right hand top corner is completely covered by the thermal armor which continues on the other side of the memory slots, albeit with an opening which reveals the beige colored 24 pin motherboard power connector, the MemOK! Button, and a teeny-tiny DRAM_LED. I would have really loved to see a two-digit LED debug display here, but for some reason it is absent. One more thing in my wish list is fan headers on this unused area here, but I guess the area was left clean because of aesthetic purposes.
Next to this are the PCH and the storage section. Between the DRAM slots and the first PCIe expansion slot is another fan installation location, but this fan actually sits outside the armor instead of in it – which kind of breaks the visual continuity since the fan is black in color, but it is an optional attachment anyway. The Mark S, like the Mark 1 does not have an additional PLX chip, so the PCH Heatsink is fairly small, and the theming continues here as well.
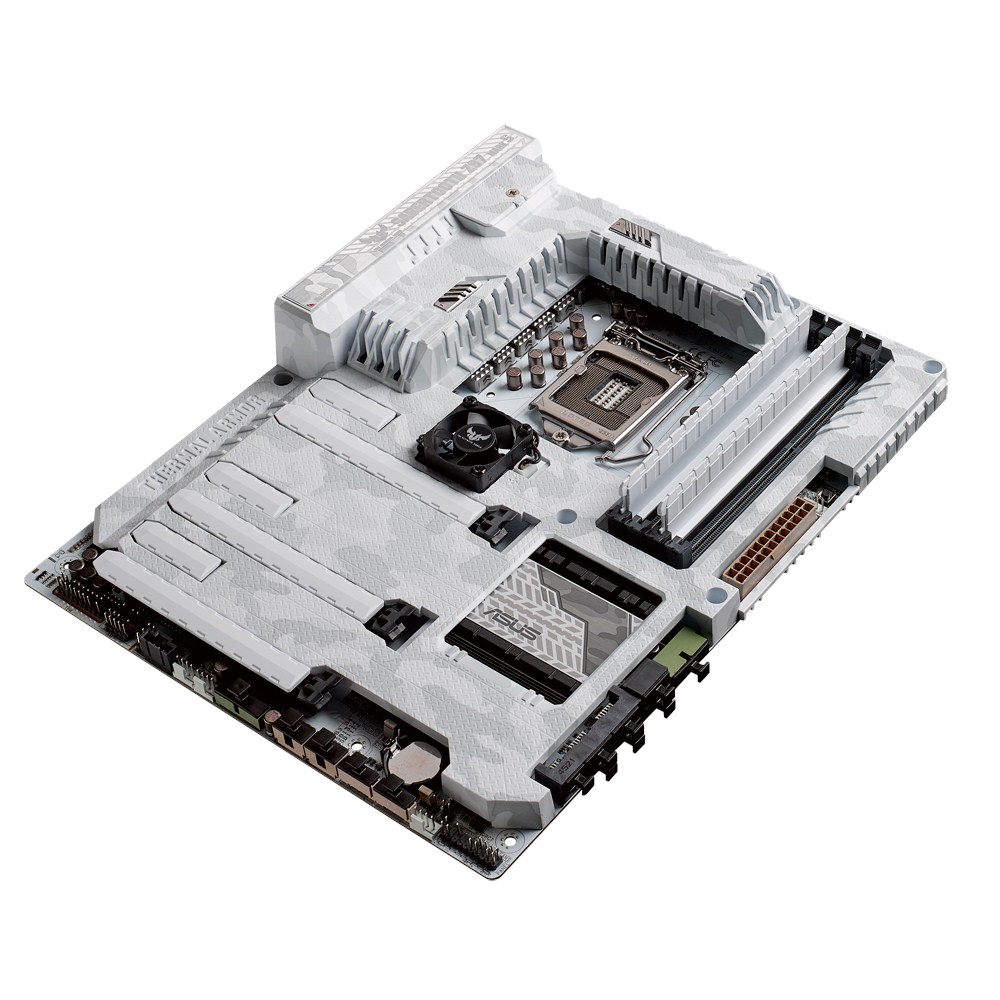
The storage section starts with a right-angled USB3.0 internal header (PCH). This is a welcome addition, since in most of the cabinets the USB3.0 cables are stiff and take some time to properly manage. The port is colored navy green in accordance with the Sabertooth theme. Next to that are a total of six black SATA 6GBps ports, all from the PCH. These SATA ports support RAID 0/1/5/10 modes. There is a single SATA Express connector on board, which takes two SATA 6GBps ports when used. Additionally, in the bottom part of the motherboard we see two more SATA 6GBps ports courtesy the AsMedia ASM1061 controller. Those ports are colored beige.

The bottom section of the board is busier than usual. There are the front panel power/reset/HDD indicator headers, three 4-pin fan headers, the second USB3.0 header (PCH), two USB2.0 internal headers, the AsMedia SATA connectors, a TPM header, a Thunderbolt header, and the front panel audio connector. We also have the jumpers for CPU overvoltage and clear CMOS functionalities near the CMOS battery. There is also an SPDIF_OUT header as well, right next to the front panel audio connector.
The audio section has a separate PCB though the path is not LED lit. It uses an upgraded Realtek ALC1150 codec with the Nichicon audio capacitors and supports 192 KHz/24-bit True BD Lossless Sound, 112 dB SNR stereo playback and 104 dB SNR recording input.

The PCIe layout is ideal for two-card setup. In the Mark S, we get three PCIe x1 slots and three PCIe x16 slots, but the top two PCIe x16 slots are version3.0 and electrically wired x16, while the last PCIe x16 slot is version2.0 compliant and operates at x4 – which makes it unsuitable for GPUs. The two PCIe3.0 x16 slots operate at x16, or x8/x8 for dual GPUs. The slot spacing is good and should allow for even triple slot GPUs, though if you use two of such cards, you won’t be able to use two of the three PCIe x1 slots.

The TUF sensor chip, the LAN and AsMedia controllers are located right between the PCIe section and the audio section of the motherboard.

The I/O section has four USB2.0 ports and a BIOS flashback button on the left hand side. Between these two there is a considerable gap to allow for the ASST_FAN to exhaust air out. Next to the BIOS flashback button there are the video outputs – a HDMI and a full-sized DisplayPort out. Then there are four USB3.0 ports (two from PCH, two from the AsMedia controller) and two GbE connectors (Intel I218-V, Realtek 8111GR). The audio outputs are next and we get the standard 5 audio jacks plus an optical S/PDIF out.
BIOS/UEFI Overview:
The BIOS/UEFI is one of the most important sections of a motherboard package and the ease of a user in UEFI goes a long way in defining the entire experience. Fortunately, ASUS has been improving their UEFIs since their early adoption from P67/Sandy Bridge days and I have to admit that I found it relatively easier to handle what they have done with their UEFI in most recent boards, be it Z97 or X99. The entire UEFI feels much more polished as well than their competition, but there are still some ways of improvement and hopefully these will be ironed out in the future releases.

The UEFI has a grey background to go with the Sabertooth theme, and for Mark S, ASUS has added touches of white to differentiate it from Mark 1. The initial screen has an Easy Mode enabled and displays the summarized information. You get information about motherboard BIOS version, CPU/DRAM/motherboard/HDD information and system fan information. Users also can change XMP (enable/disable/modes), select the system tuning from a couple of preset modes, set boot priorities as well do fan tuning. There is also an option to open a wizard to tune the system aspects from here, and one can directly pop into boot menu to have the system boot from a specific hard disk drive.

Change to advanced mode and we see that there are eight sections (one may call them tabs) in total. The right hand section of the UEFI is dedicated to hardware monitoring where CPU/DRAM frequency/voltage/temperatures are shown, along with input voltage values for +12v/5v/3.3v lines from the PSU.
Main: This is the homepage for Advanced Mode. Displays current BIOS/CPU/Memory information as well as options to change system date/time and language (language changes only limited to UEFI).
Ai Tweaker: This is the section to primarily tweak the CPU and DRAM. There are a plethora of options on board here and upon selecting particular values the resulting options are displayed on the top of the page as target values. These target values are colored yellow to separate them from current values.
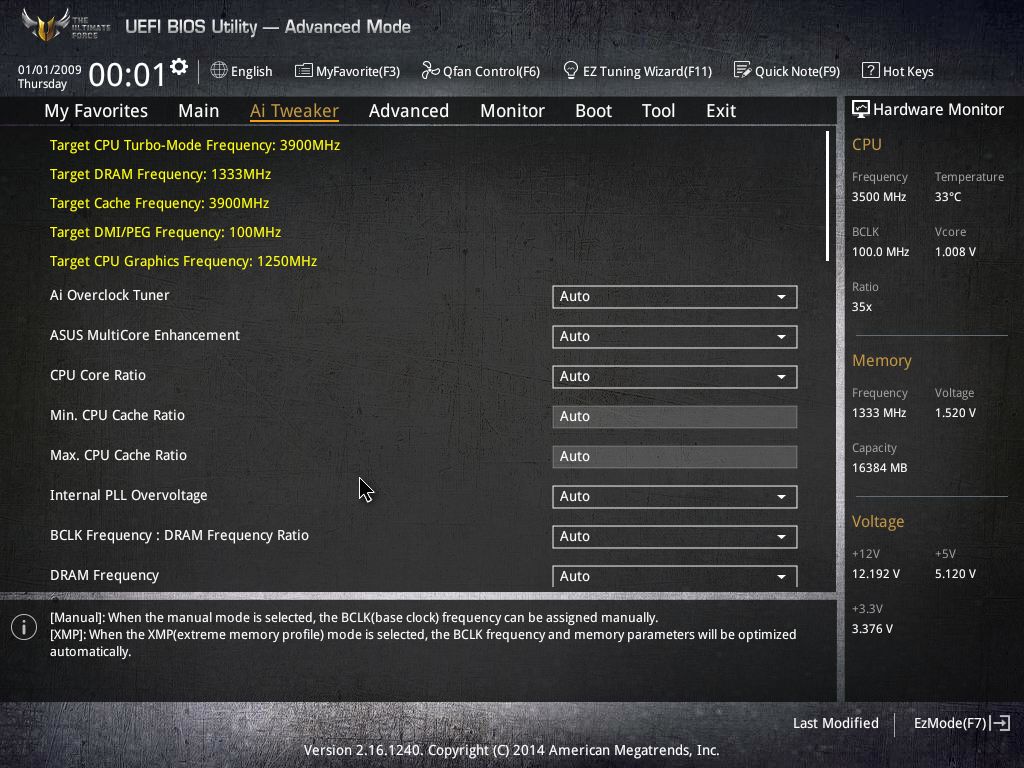
Advanced: If you thought you are lost in the dungeon in the Ai Tweaker, the Advanced section presents even finer details to tweak for CPU/PCH/System Agent/USB/APM/Onboard Devices/Network Stack. I admit I do not know what all of these do, and neither do a majority of users, but the options are there to play with anyway.

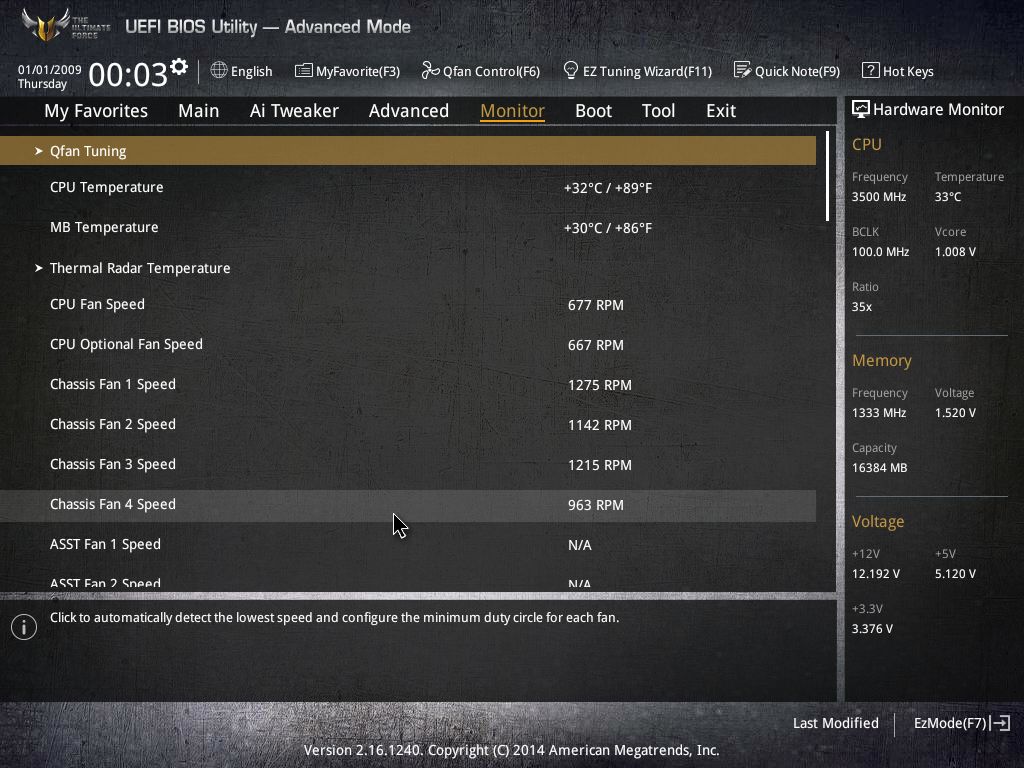
Monitor: This section is pretty self-explanatory and presents current values for CPU/MB temperatures. For Sabertooth boards we also get Thermal Radar Temperatures which basically relay the sensor readings from different temperate zones in the motherboard.

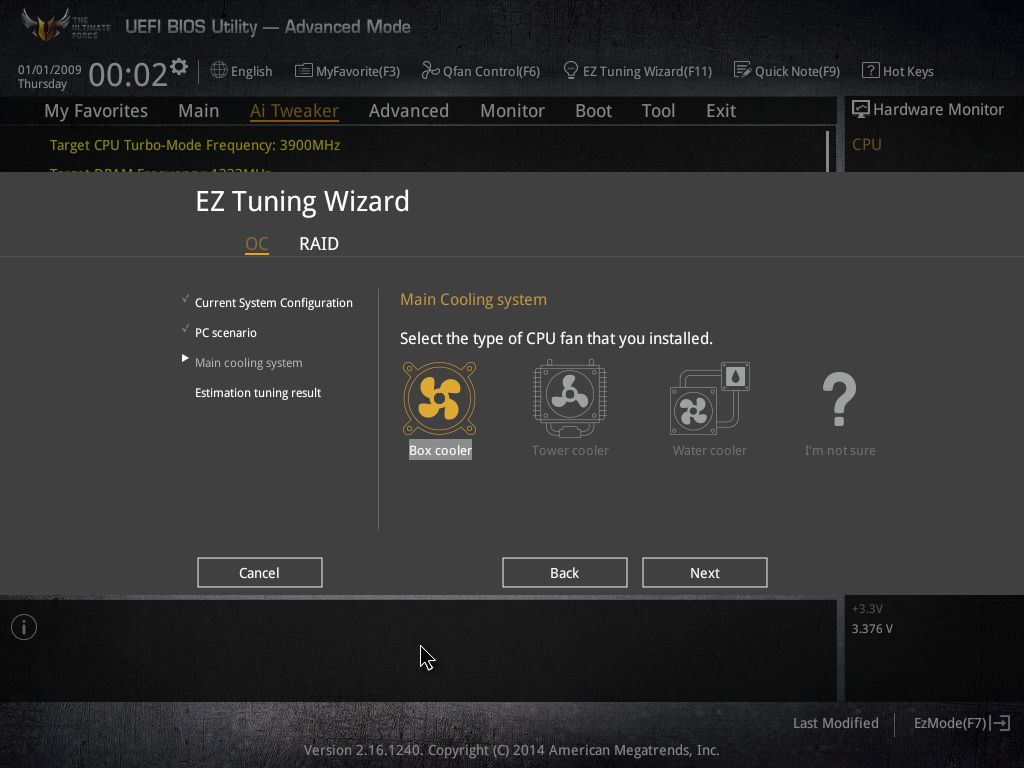

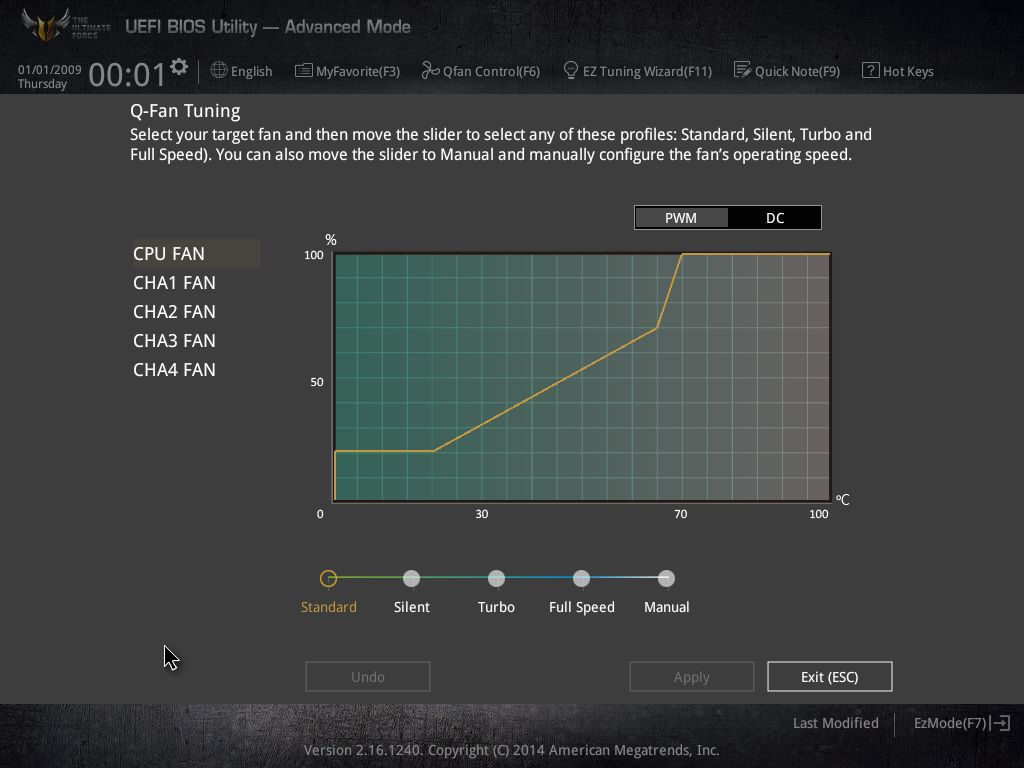
Fan speeds can also be monitored and tuned here, something which ASUS calls Qfan utility. Interestingly, the Qfan tuning can be accessed from anywhere in the UEFI by pressing F6. The presets that can be used for Qfan tuning are Standard/Silent/Turbo/Full Speed/Manual.
Boot: Different boot options are listed here, and this section has the options to change Hard Drive/Optical Drive BBS priorities as well as force boot from a storage component.
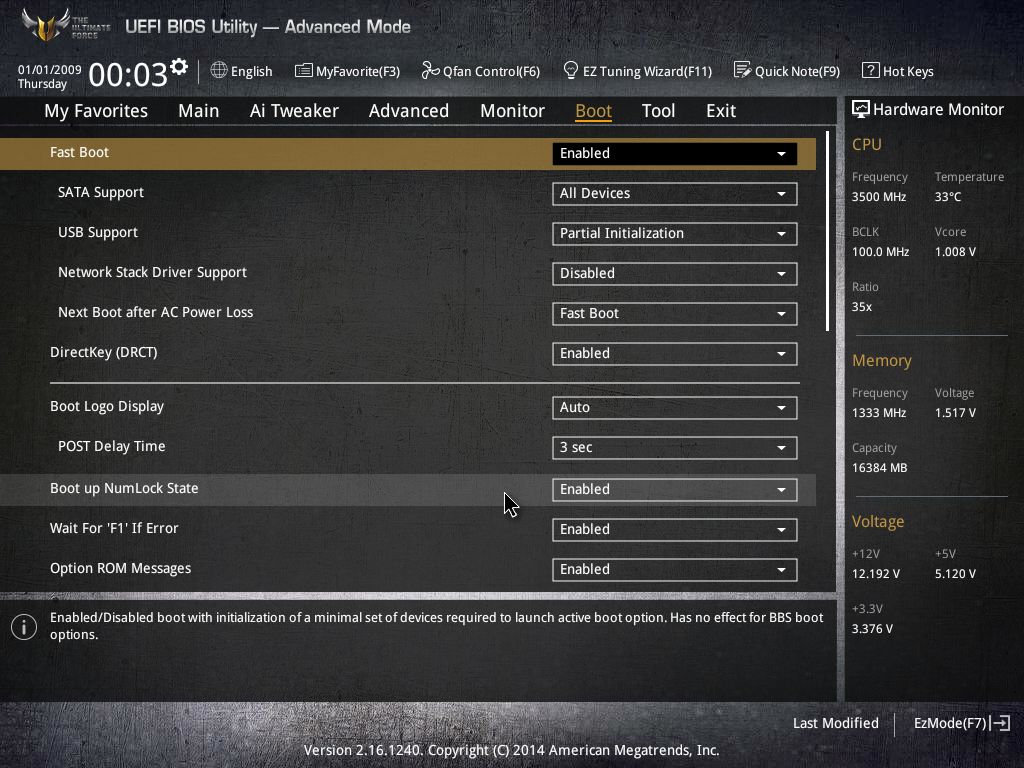
Tool: ASUS UEFI utilities are listed here. For Mark S, EZ Flash 2 is the BIOS flashing utility which lets a user flash BIOS from a compatible USB drive. Setup Animator enables or disables the animation/transition effects when pages are changed in UEFI. ASUS Overclocking Profile can be used to store and load OC Profiles, which eases out the process to go back to a particular setting, and lastly ASUS SPD information displays detailed information about memory sticks as well supported XMP/JEDEC modes.


My Favorites/Exit: You can add any of the little sections to My Favorites for easy access. The Exit menu has options to load optimized defaults, to save/discard changes, and to launch an EFI shell from USB drive.

Overall, the UEFI has improved quite a bit. ASUS continues to lead the pack here, but I would love to see them implement things like an easy mode for pages like Ai Tweaker/Advanced configuration to further simplify system tuning.
Bundled Software:
The bundled software for ASUS boards is centered around their monitoring and controlling package called AI Suite. Now in its third iteration, the AI Suite has a Black/Blue theme for Mark S. While this is easier on the eyes, for me, ASUS missed the opportunity here. This could have been given the same theme treatment or at least something on similar palette.
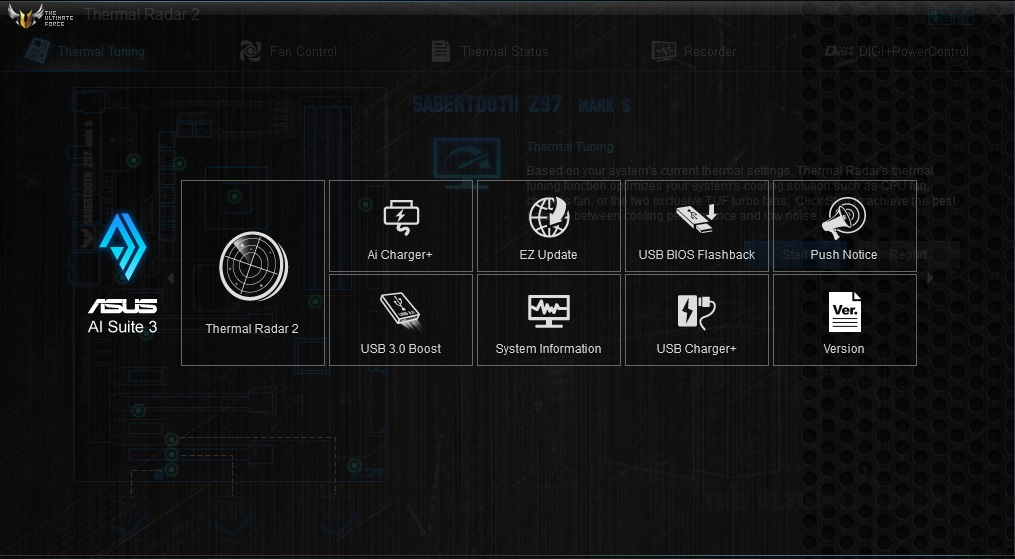
The software package is mostly divided into two categories. The first gives you all the tweaking and monitoring capabilities. For the Sabertooth Mark S ASUS calls it Thermal Radar 2. The other section is mostly comprised of utilities like Ai Charger+, USB3.0 Boost, USB BIOS Flashback, USB Charger+, Push Notice etc. There are also dedicated sections for Updating software, checking the current version and system information.
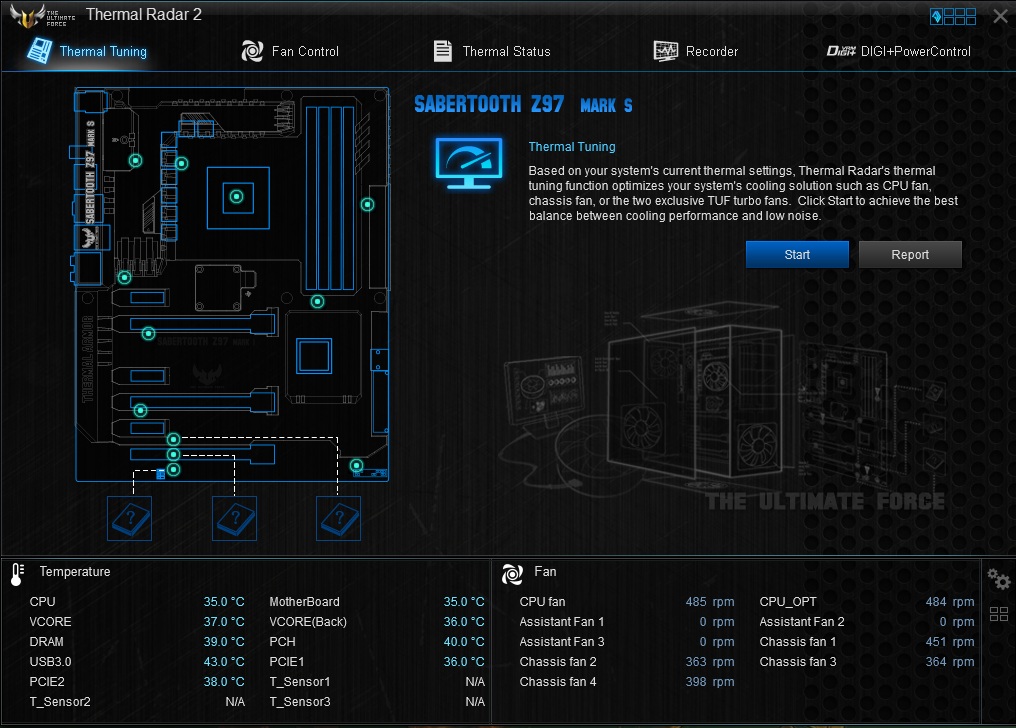
ASUS also includes their custom themed cFOSSpeed utility called Turbo LAN (Network Prioritizing/monitoring software). Other software bundled includes a TUF themed CPU-Z.
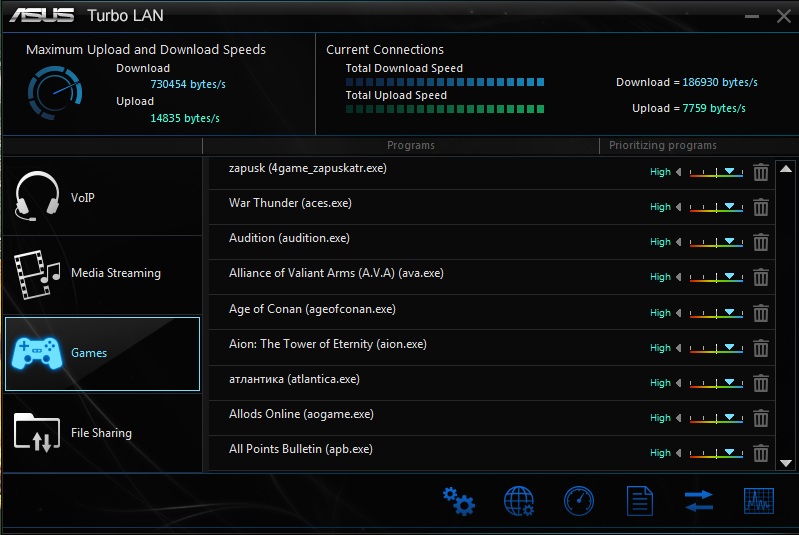
Thermal Radar 2 includes an automatic thermal tuning utility which automatically tunes the system fan speeds based on the different sensors spread around the motherboard. These sensor data can be checked in the main window where there is a full diagram of the motherboard with the sensor locations.
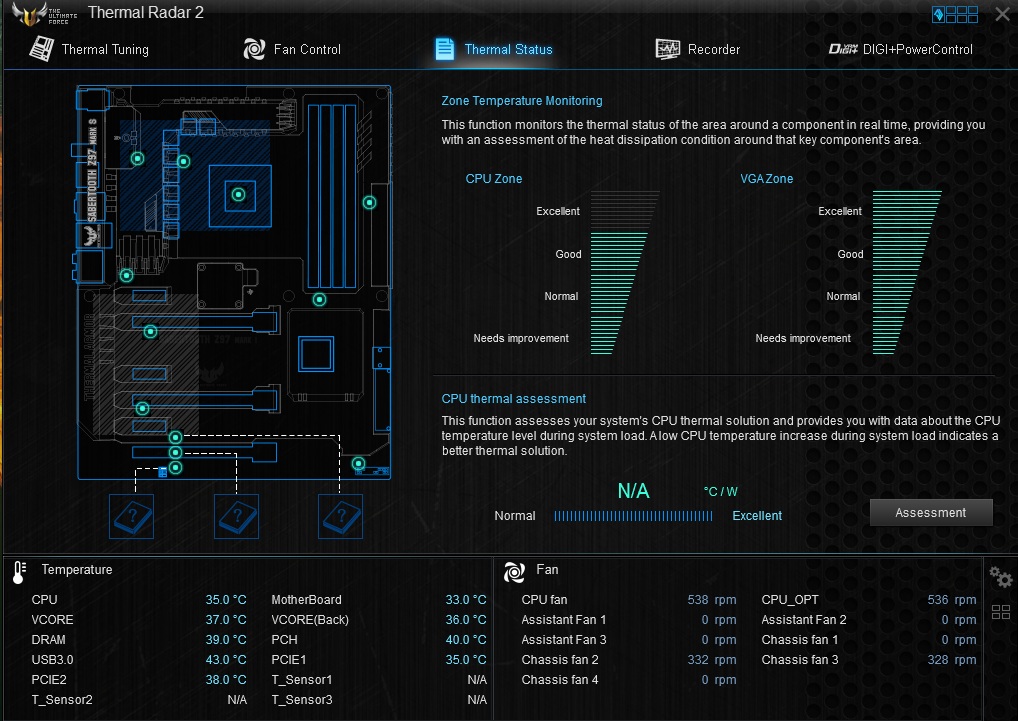
The interesting thing here is the division of the motherboard into different temperature zones and subsequent thermal status (Needs improvement/Normal/Good/Excellent) based on the information being sent by the sensors.
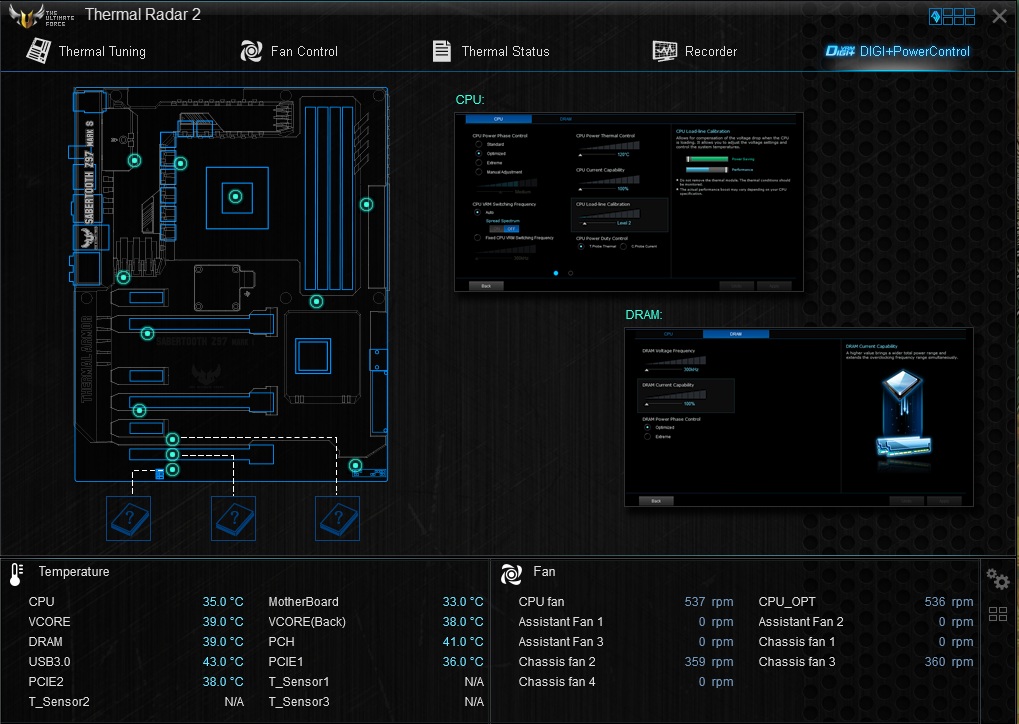
DIGI+ Power Control is the overclocking/tweaking utility for CPU and Memory. Again, there are presets which can be used to overclock the CPU to a certain level, or manual controls can be used.

There is option of logging the sensor data as well as monitoring them side by side in a graphical manner in the Recording section. Here a range of voltage/temperature/fan speeds are monitored. One can also see a summarized section of the data in the bottom section of the window.
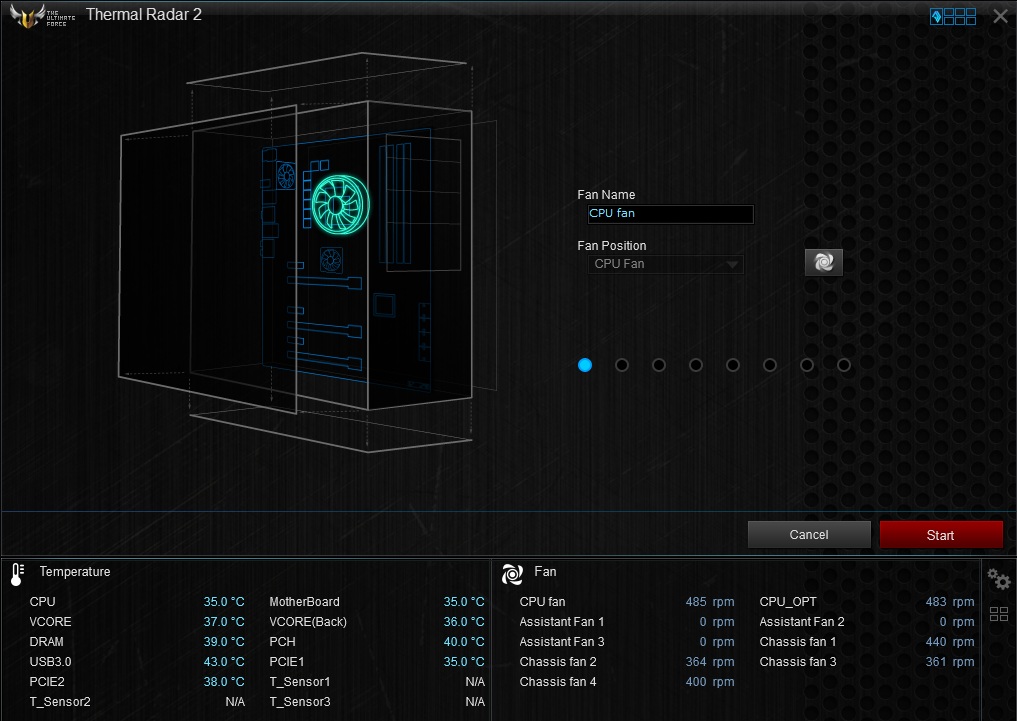
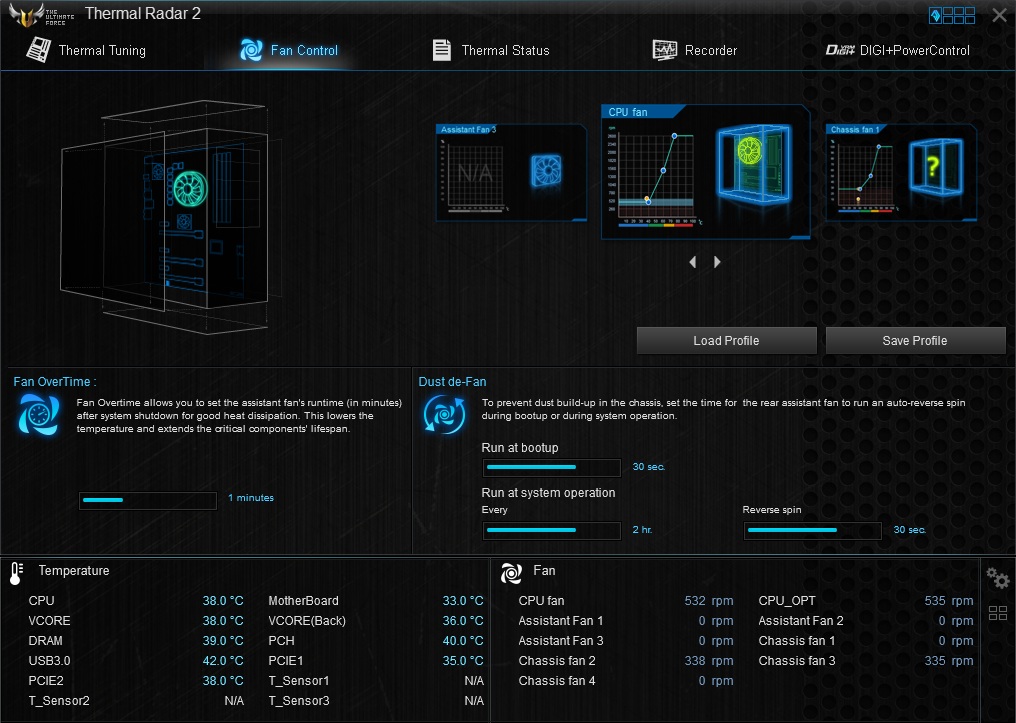
Fan control is also robust here. There is an option to manually select each fan for custom profiles or use a preset profile that applies to every fan.
One point that continues to annoy me is how hit-or-miss ASUS’ update utility is. Even with updates being posted in the ASUS’ site, more often than not the utility did not show any available updates. This is something which needs to be fixed soon.
Test setup:
The following hardware was used for this review:
- Intel Core i7-4770K, Haswell, 4C/8T, 3.5GHz stock, 3.9GHz Turbo
- ASUS Sabertooth Mark S, BIOS version 2012
- 16 GB Kingston HyperX Beast 1600MHz DDR3 memory, CL9-9-9-27
- Sapphire AMD Radeon R9 270X GPU, 2GB GDDR5, Catalyst Omega drivers
- Kingston SSDNow V300 64GB SSD for boot drive
- Western Digital Caviar Green 3TB for data drive
- Corsair H100i AIO liquid cooler for CPU cooling
- Cooler Master Silent Pro M1000W Power Supply
- Corsair Carbide Air 540 case
Performance:
For this review, I have taken a new approach. Instead of comparing stock v/s overclocked performance, I will concentrate on running benchmarks on stock and then compare the data with future motherboard reviews. I believe this will provide a better coverage as to where a motherboard stands in terms of performance.
First up, AIDA64 is a comprehensive benchmark suite which covers several tests to measure performance of a system’s CPU, memory, and storage subsystems.

Next I have selected a variety of benchmarks which stress different aspects of the test system.

Lastly, I wanted to see how the board performed in a couple of graphics intensive tests. I fired up CompuBench, which has built-in benchmarks to test the GPU as well as the CPU.

For overclocking, I was able to push the CPU to 4.6GHz at 1.275v VCore in the Mark S, which is a 31% increase over stock clocks. I ran a few benchmarks to show how much of a performance improvement it was over the stock. In multi-threaded 3D Particle movement, the improvement was as big as 19.5%

Conclusion:
The Sabertooth Z97 Mark S is almost identical to the Mark 1, though there are extra SATA and USB ports courtesy the AsMedia controller. Thankfully, the Mark 1 is a solid board, as is the Mark S from my review. It performed well, remained mostly tame (except when I tried to really up the ante on the CPU overclocking), and looked good while doing those. The existence of Mark S is an acknowledgment that the need for white PCB motherboards is increasing, and it is good to see a manufacturer listening to the modding community. But then again, the aesthetic appeal is relative, so there will be users who will find the white harder to maintain. Overall, the clean looks, the solid feature set from Sabertooth SKU, the dual NICs, upgraded audio and reasonable expansion options are all positive things going for the Mark S.

ASUS continues to improve on the UEFI, and in Mark S we see their Z97 UEFI implemented with the arctic camo theme. I have already expressed my mirth about how easy it is to use ASUS’ UEFI, but there are still some niggles here and there that they need to fix. The amount of options provided can be overwhelming for a user so there needs to be an easy mode of some sort. The last part is true for almost every manufacturer these days and is not something specific to ASUS, however.
The software is also robust. One can find many user reviews with the AI Suite, mostly about how inaccurate its sensors can be at times, but with the Mark S I didn’t see any such anomalies. The fan control is amongst industry’s best, and while other manufacturers are slowly catching up, ASUS leads the pack with ease of usability.
Now, no product is perfect. With the Sabertooth Mark S, I have a couple of gripes as well. Why a premium board like this doesn’t have a LED debug display is beyond my comprehension. Also, the added features over the Mark 1 are paper thin. I for one expected ASUS to push some of its more premium features to the Mark S. SupremeFX audio wouldn’t have hurt, LED lit path separation wouldn’t have either. The software doesn’t have the arctic camo theme, but that can be fixed with a future update. The thermal armor proves to be detrimental for the upgrade path: at least for M.2 storage or a WiFi/BT module which should have been bundled with this motherboard. Lastly, I would have loved to see ASUS go the whole hog and provide nice white braided SATA cables instead of cheap looking black ones.
Nevertheless, the Sabertooth Z97 Mark S is a unique beast. It is definitely not everybody’s cup of tea, but to the white-loving modder it is a fantastic building platform. Now bring us that white PCB GPU, ASUS!


