dslr beginner's guide
So you’ve been browsing a lot of Instagram over the past few months and started following a number of awesome photographers, you have even picked favorites at this point. After gazing at these amazing pictures you have finally come to the realization that you want to click snapshots like these, but you come to the realization that your point and shoot camera isn’t quite cutting it and that it’s finally time for a new camera.
You sacrifice a chunk of your savings in the name of art and get a shiny new DSLR (or Mirrorless) camera, but as soon as you almost rip through the box, pull the camera out, attach the battery and turn it on you are met with a billion dials and options. You’re bamboozled, and that’s fine because pretty much every person starts here (and if you didn’t… how?).
This is exactly where this guide comes in, and by the time you’re done reading you’ll gain some confidence and understand that after a certain point the technicalities are ultimately not as complex as it seems. For the sake of convenience I’ll talk about DSLRs only since mirrorless cameras are largely similar, except in some places which are not of concern as of now. Let’s commence.
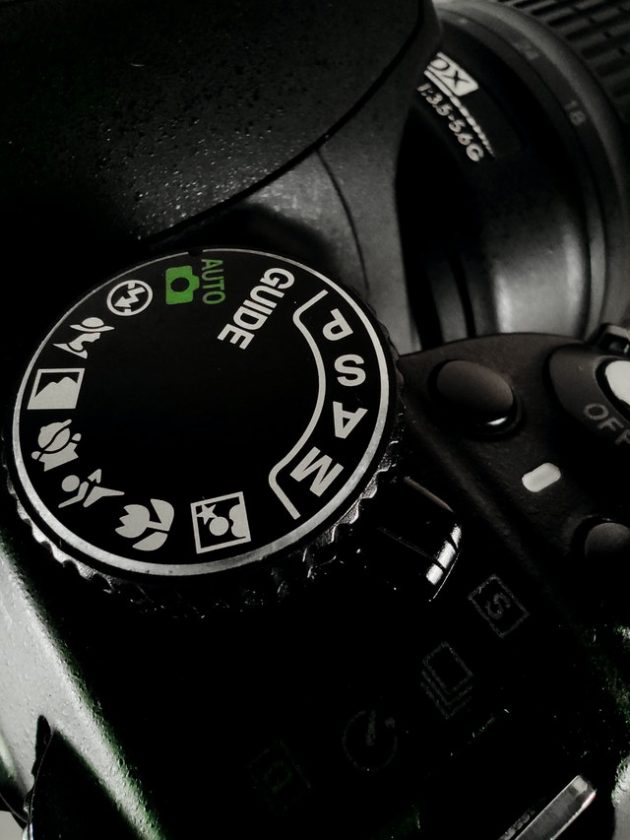
Stay away from auto… for now
It’s very easy to give up trying to tackle settings early on and just switch to auto and fire away. But by doing that you’re basically turning your camera into a point and shoot and losing all the control while it is literally the most important aspect of a DSLR camera. By using the camera on auto, you’re letting the camera decide how to expose for a scene and quite often you won’t get proper results. Sometimes it will try to artificially brighten a dark scene but ruin the depth of field while at other time while taking a portrait you might find out the sky in the background is totally blown out and has no detail left.
Even when you need a quick snap, even using Shutter or Aperture Priority modes will get you much better results without losing every bit of control. Try to use auto only when you have no other option or don’t care about the quality of that particular image too much. Just use the manual mode as much as you can because you’re going to get the best results by manually taking control of your camera.
Start shooting RAW
Every single DSLR and Mirrorless camera will have a setting to change the capture file format and changing it from JPEG to RAW is the first thing you should do. There can also be an option to save in both formats so you can use it as well for the sake of convenience since RAW files aren’t compatible everywhere.
RAW pictures are considerably larger than JPEG because they hold a lot more information so it gives you a field day when you’re editing a picture. If you mess up the exposure of a shot, you can correct it to some extent in post while in formats like JPEG there is simply no way to do it. Consider buying a class 10 SD card with at least 32gb capacity, they aren’t very expensive anymore and you’re going to thank yourself later.
Just Use Autofocus
Autofocus systems have come a long way and they are very dependable in most modern cameras from the majority of manufacturers. This is especially true if you own a Canon camera, their unique dual-pixel autofocus is very fast and precise. PDAF on Sony cameras are brilliant as well. You won’t need manual focus except in specific situations, other than that autofocus is even used by the pros on a regular basis y’know?

Understanding Exposure
In order to capture an image, light has to pass through the lens and fall on the sensor. In the simplest possible terms, the amount of light falling on the sensor while capturing an image is the exposure for that particular shot. Understanding exposure and knowing how to get the results you need by changing the settings on your camera to achieve a particular exposure is basically the most important goal of photography.
Overexposing is when some parts of the picture (or the entire scene) is too bright and losing details, and Underexposing is when majority of the image is too dark and the image is getting grainy and flat. Perfect exposure is when a picture isn’t too bright or too dark and has adequate exposure on the subject or scene you’re trying to focus on. Obviously these rules are not set in stone and you can deviate from it for artistic reasons but for the most part this is what you’ll be working on in almost every image.

Too complex to understand? Well it doesn’t have to be since you already do it subconsciously to a certain extent. Don’t you move away from a bright object blasting light at your face while trying to take a selfie because it’s blowing up your face? What you’re trying to do is reduce some light from an overexposed image. Don’t you turn on the flash when it’s too dark but you just have to take a photo of this well decorated dish in a dimly lit restaurant? You’re trying to fill some light into an underexposed image.
The Exposure Triangle
Now that we know what exposure is, let’s talk about how to adjust it. There are just three main settings that you will always adjust to expose a scene: Aperture, Shutter Speed and ISO. They form what is known as the ‘Exposure Triangle’ and are by far the most important three camera settings you will need to adjust all the time for every scene. A well-exposed image is a balance of good adjustments of the aperture, shutter speed and ISO.
Aperture
Simply put, aperture is the pupil of the lens. It directly controls the amount of light passing through the lens by controlling the size of the opening width of the shutter. Now another important aspect is the fact that the depth of field of an image also varies with aperture.
Depth of field is the range of sharpness in front and behind the distance your lens is focusing on. At lower values of aperture, depth of field is bigger and as the aperture opens up the depth of field goes down. Aperture is typically measured in f-stops i.e. f/x where x is a number.
Lower the f-stop number, bigger the aperture and higher the depth of field, and vice versa.

What you need to remember is that at lower f-stops like f/1.8 the shutter is wide open allowing lots of light in but it has a very shallow depth of field, which is perfect for photos which need background separation to highlight the subject in focus such as portraits or macros, while at a higher f-stop values like f/22 the depth of field is gigantic which means everything will be in focus, making it perfect for landscapes and real estate photography where objects are spread across a wide range of distances.
Shutter Speed
Aperture implies how much wide the shutter is open, shutter speed on the other hand implies how long the shutter is open exposing light into your camera’s sensor. It is measured in seconds (most often in fractions) such as 1/60, 1/400, etc.
Shooting in low shutter speeds can often introduce camera shake in the image. While shooting handheld the camera has a weight and our hands naturally cannot stay completely still and are bound to shake even if only a little, and in lower shutter speeds it is easily picked up resulting in loss of sharpness and motion blur.

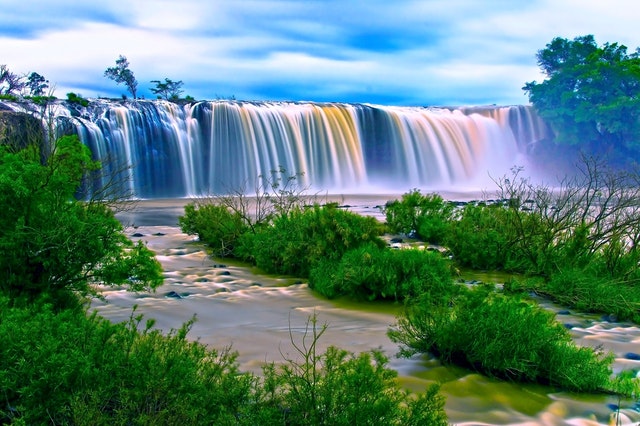
Although this isn’t always bad since in some cases you will need to need to shoot in lower shutter speeds to give it a sense of motion or action. For example, when shooting waterfalls you need the shutter to be open for a good amount of time to smooth out the streams of water so it appears to be flowing.
Shooting in a higher shutter speed lowers the capture window and reduces the chance of motion blur. At higher shutter speeds you can make things look frozen in motion, for example a skateboarder jumping from a platform and frozen mid-air in the picture with complete sharpness.
ISO
ISO basically adjusts the sensitivity of your camera sensor towards incoming light. Unlike aperture and shutter speed, it doesn’t directly change the light falling on your sensor. Think of ISO as artificial exposure for your image.
Imagine you are shooting a portrait in the evening and you have set your aperture for that nice background blur and shutter speed low enough to create a sharp image… and the image is still too dark. Your aperture is already open at the widest f-stop and if you lower your shutter speed it’s going to introduce some jitter due to the natural camera shake which you don’t want. What do you do? You simply crank the ISO to a higher value and it helps brighten up the scene the way you want.
Sounds good right? Actually, there is a major trade-off with increasing ISO, which is the fact that as you keep increasing ISO you also introduce grain in your image which is highly undesirable. More grain also makes your image appear too flat (lacking in depth). Modern cameras can go quite high without noticeable grain but after a certain point it is very noticeable. ISO stops typically start from 100 which is called base ISO all the way up to 25600 in some cameras, depending on the model.
Key takeaway is that fact that you want to keep your ISO as low as possible.
Also, every camera has a native ISO, which is where the camera’s sensor can capture the best details. You can look up the native ISO for your model for the sake of curiosity but for now think of this as an advanced tip which you don’t need to sweat about just yet.
Fun fact: In modern cameras it is very easy to adjust ISO, all you to is rotate a dial. In film cameras you have to use film rolls which have one specific ISO, which you can imagine is much more difficult and needs more advance planning of your shots.
Some Important Practical Information
All three parameters of the exposure triangle work in tandem. Change in one has an effect on the other two. In order to balance a scene, you will need to adjust these parameters to values which work together to create the type of image you want. Measuring light in stops is the key to this.
Every successive stop in each of the parameters exponentially doubles the amount of light due to that parameter.

ISO doubles on every stop starting from 100 to 200, then 400, 800, 1600, 3200 and so on. This means that going from 100 to 200 doubles the brightness due to ISO. Then 400 doubles the brightness from 200 and keeps doubling like so.
Shutter speeds also follow the same formula. Decreasing the speed from 1/240 to 1/120 doubles the capture time window, and hence doubles the light allowed and then further decreasing to 1/60 doubles the amount of light from 1/120.
Aperture is slightly confusing of the bunch. Especially since numbers aren’t always very apparent on first glance when understanding when it doubles. Most common full stop jumps you’ll see in terms of aperture numbers are: f/1.4, f/2, f/2.8, f/4, f5.6, f/8, f/11, f/16, f/22 and f/32. But where it gets even more tricky is that some values of aperture are often a fraction-stop from the f-stop number. For example, f/6.3 is f/5.6 + 1/3rd of a stop and f/3.5 is f/2.8 + 1/3rd of a stop.
Go through this as many times as you need at your own pace and try it out with your camera, you’ll get it in no time because it actually isn’t difficult to remember once you start using them often.
White Balance
This basically refers to changing the color temperature and shifting some color tones so that the image looks more natural in the photograph.
Your white balance will, by default, probably be at Auto White Balance (AWB) where you camera tries to guess the tone and adjust based off it which is often not very satisfactory. The other modes include Daylight (for shooting in bright sunny outdoors), Shade (uplifts warm tones in shady compositions where the color naturally shifts to cooler tones), Cloudy (overcast weather usually produces this dull diffused light effect which is warmed up by this profile), etc. There is also a custom temperature setting to let you manually adjust the color temperature (typically between 2500-10000K i.e. coolest to warmest).
You can also adjust your gray point with a reference gray card but don’t worry about that for now. If you cannot nail white balance don’t worry too much, if you’re capturing in RAW you should be able to readjust the color temperature or remove color casts to a good extent in post. Popular photo editing software like Adobe Lightroom has enough tools to let you do this.
The ‘Better Auto’ Camera Modes
Now that you know what aperture and shutter speed does, you can utilize two particular modes which I like to call the ‘better auto’. These are good places to start if trying to tackle everything in manual seems too much when starting out.
Aperture Priority (A or Av): It is a camera mode where you set an aperture according your requirement and the camera automatically adjusts the ISO and shutter speed. This allows the depth of field to be the same no matter what the other settings are. Use it for quick portraits or object photos, it won’t disappoint. It is by far the most useful mode after manual if you ask me.
Shutter Priority (S or Tv): Similar to aperture priority but this time it’s the shutter speed that you’re in control of. Amazing for moving shots like cars or sports photography. The camera will decide the aperture and ISO values to get a good exposure.
Metering
While using modes like auto, aperture priority or shutter priority where the camera has some control over the exposure, it will try to judge the scene and adjust it to an exposure which evenly exposes the light and dark parts to an average of 18% gray (aka the middle grey). The area of the composition it uses for this judgement is determined by the metering setting.
Average: The camera will set the exposure based on the tones across the entire span of the composition that is visible on the viewfinder (or screen).
Center-weighted: The camera judges the adjustments based on the majority of what it sees in the center of the frame, overlooking tones near the edges of the composition.
Spot: Here the camera will use a very small circular portion of the composition as reference, you can set the point of reference.
Average and center-weighted metering are good starting points. You can use spot metering once you develop a little sense about when a scene is properly exposed.
Exposure Compensation
Let’s say you’re using these semi-auto camera modes (or even auto, you know who you are!) with a metering type you are comfortable with and it seems like the camera is misjudging the scene and setting an exposure higher or lower than you desire. In this kind of a situation you can improve the camera’s auto adjustment with the help of exposure compensation.
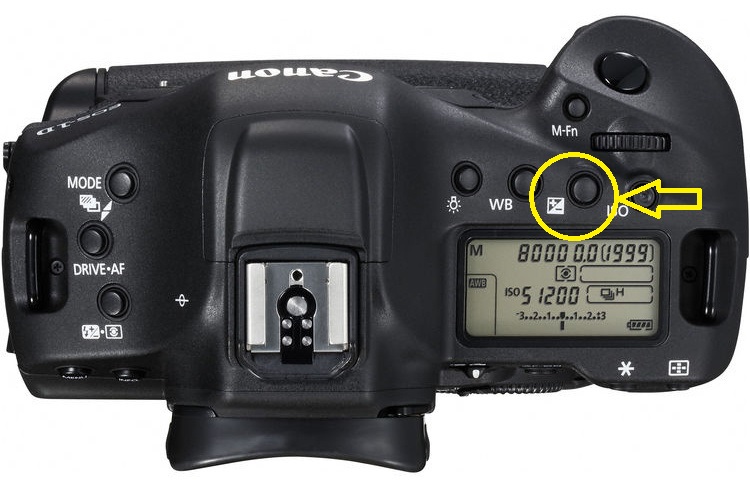
Somewhere on your camera body will be a button marked with an enclosed +- label, typically on the menu dial on the right side of your display or as a dedicated button near the shutter button on the top. Pressing it will open up a menu where you can apply positive or negative compensation to the scene. You will probably need this a lot because the camera’s middle grey assessment system isn’t always the best.
When you notice the camera underexposing your composition, apply positive compensation to brighten it up and when it is overexposing the scene just drop it a few stops with some negative compensation.
Wrapping Up
Going back to what I said earlier, after a bit of playing around with your camera it will not be nearly as complex as it might seem right now. I know at this point it’s easy feel lost between terms like ‘white balance’, ‘exposure compensation’ and ‘metering’ but don’t get lost in the technicalities, that will sort itself out as you go, think more about the thought process behind a good photo. The most important thing to understand is that your camera isn’t a magically complicated contraption, rather it is merely a tool (a fancy one) to let you do particular things in ways that you want to achieve a desirable final result.
Also, none of the rules are set in stone. Almost all of the metrics here can be exploited in unconventional ways to achieve extraordinary and unique snapshots. Brandon Woelfel‘s mind blowing neon photography would not have been possible without breaking conventions, photographers do it all the time! The only thing that can hinder you is the ceiling of your own creativity, all I intend to do with this guide is to fuel your drive and give a push in the right direction.
With enough practice you will quickly build up the understanding of how to expose your shots and what settings you need to achieve it. Right where this article ends, YOU begin. I will probably do a short follow-up in the future where I will be briefly talking about lenses and studio equipment. Follow TechARX and be the first one to read it once it drops, also feel free to read about all the latest and greatest happening in the gaming and technology industry, all in one place.