Purpose of this build
This build is not for gaming, photo editing or for power users. This is going to be a budget build, a bare bones one, which will have enough horsepower for daily uses like web browsing, emailing, and can even be a good HTPC. This PC is also a good starting point for builders who aren’t particularly into gaming. At the end of the day, not everyone one wants to push for higher framerates, isn’t it? But that doesn’t necessarily limit you to the exciting world of building your own PC. The parts listed in this build will be extremely budget oriented, for the purposes mentioned above. Without further ado, let’s get down to it!
The Budget: Moolah you need to spend
Don’t worry, as promised, this will be a budget PC. Building this should cost you around 25k rupees.
Processor
For this build, we will be using a Pentium G4400. Don’t get fooled by the fact that it is the cheapest one from the Skylake brethren, as it is no slouch by any means. In fact, this little thing is a pretty neat processor and for the price that you pay for it, it provides adequate performance. For day to day activities like the ones mentioned above, this one won’t sweat if you keep its limits in mind. It’s admittedly a dual core bare bones CPU, but armed with a 3M cache and clocked at 3.30 GHz, it will have enough gusto to power everyday needs, speaking from personal experience.

Motherboard
For this build, we will be going for the cheapest option there exists for the Skylake platform, the H110 chipset. While the H170 and Z170 boards are totally out of question here, we picked this over the B150 chipset as spending more on the motherboard than the processor did not seem like a very wise decision. Plus, you won’t be needing most of the features that the B150 chipset brings over the H110, but they are good to have.
Keeping these factors in mind, I went with an ASUS H110M-K, and boy does it surprise! This m-ATX motherboard has got a host of features and a simply brilliant BIOS (same one that powers my Z170P!). The value for money offered by this board is crazy, considering that it’s priced at just above 4.5k on Amazon, and might be cheaper in local stores.


Power Supply
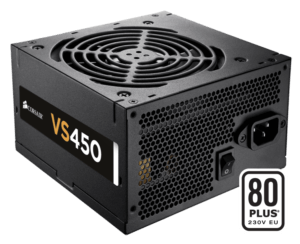
We at TechARX cannot stress more upon how integral the power supply of a build is. It is solely responsible for providing adequate power to them. As always, we are not at all skimping on the PSU part but we had to scale back on our ambition since its a budget build. For this build, we have chosen an economical Corsair VS450. This little wonder of a PSU will surprise you when you take account of how much you actually paid for it. It’s silent and coil whine is absent at most of the times (believe me when I say this, but I found it out to be quieter than its bigger brother the RM650 which powers my primary build). It is also efficient enough and has an 80+ rating.
Memory
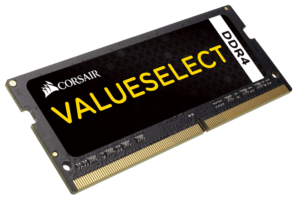
For this build, we went with a single stick of Corsair Value Select 4GB DDR4 memory clocked at 2133 MHz. This was sufficient for the intended purpose and we also have the ability to upgrade to dual channel 8GB memory as and when the necessity arises.
Storage
This actually depends on the following parameters:
- The amount of money you are willing to spend
- Intended purpose of the build
Hard Drive
Reliable, trustworthy and known product. Tried and tested to a limit where you simply can’t go wrong with this purchase.
SSD
Here’s the twist! I know, this is a budget build alright! But when I was building this, the idea of pushing in a 120GB SSD came in and while testing it out, I was absolutely amazed at how the experience changed. It’s another thing that I had to sadly swap that out as the intended user needed more real estate than speed.
I would definitely urge you to drain some more money and toss in a 120GB SSD. Come on, this is 2016, you deserve one! If you’re that much tight on the budget, I would suggest to get the SSD first and save up for the HDD later. In most cases, it’s the opposite but the performance boost it provides cannot be ignored at all when you want the best out of your budget build.
When it comes to economically priced SSDs, the UV400 by Kingston wins hands down! Watch out for a review of this little guy soon, a potential successor to the brilliant UV300.
Case
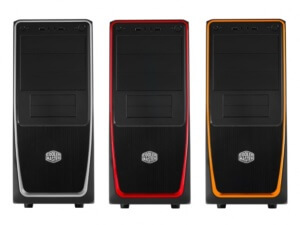
For this build, we went with a no-nonsense budget offering from Cooler Master, the Elite 311. It’s a no frills case which looks simple and clean. While putting the build together, I found it to be easy enough to work with too, other than a slight difficulty in mounting an SSD.
Note
A selection of keyboard and mouse was not included in this build as they are better off to be decided keeping the intended purpose in mind. I built this one for maintaining accounts in a small business and chose a Logitech MK220 wireless combo and a pretty small ASUS VH168 monitor.
Also, I would definitely suggest going full open source with the software and OS. Ubuntu 16.04LTS runs absolutely fine in this build.


